Shopify
Here’s how to connect your chatbot to your Shopify site in just a few steps. Whether you're offering support, onboarding, or product guidance, integrating your assistant into your app will enhance user interaction and streamline communication.
Step 1: Prepare Your Olivya Chatbot
Start by signing into Olivya’s platform. If you’re new, create an account to begin. Once logged in, set up your bot by feeding it the information it needs—this can include uploading documents, entering plain text, adding website URLs, or uploading FAQ-style content.
This content forms the foundation of your chatbot’s knowledge and response capabilities.
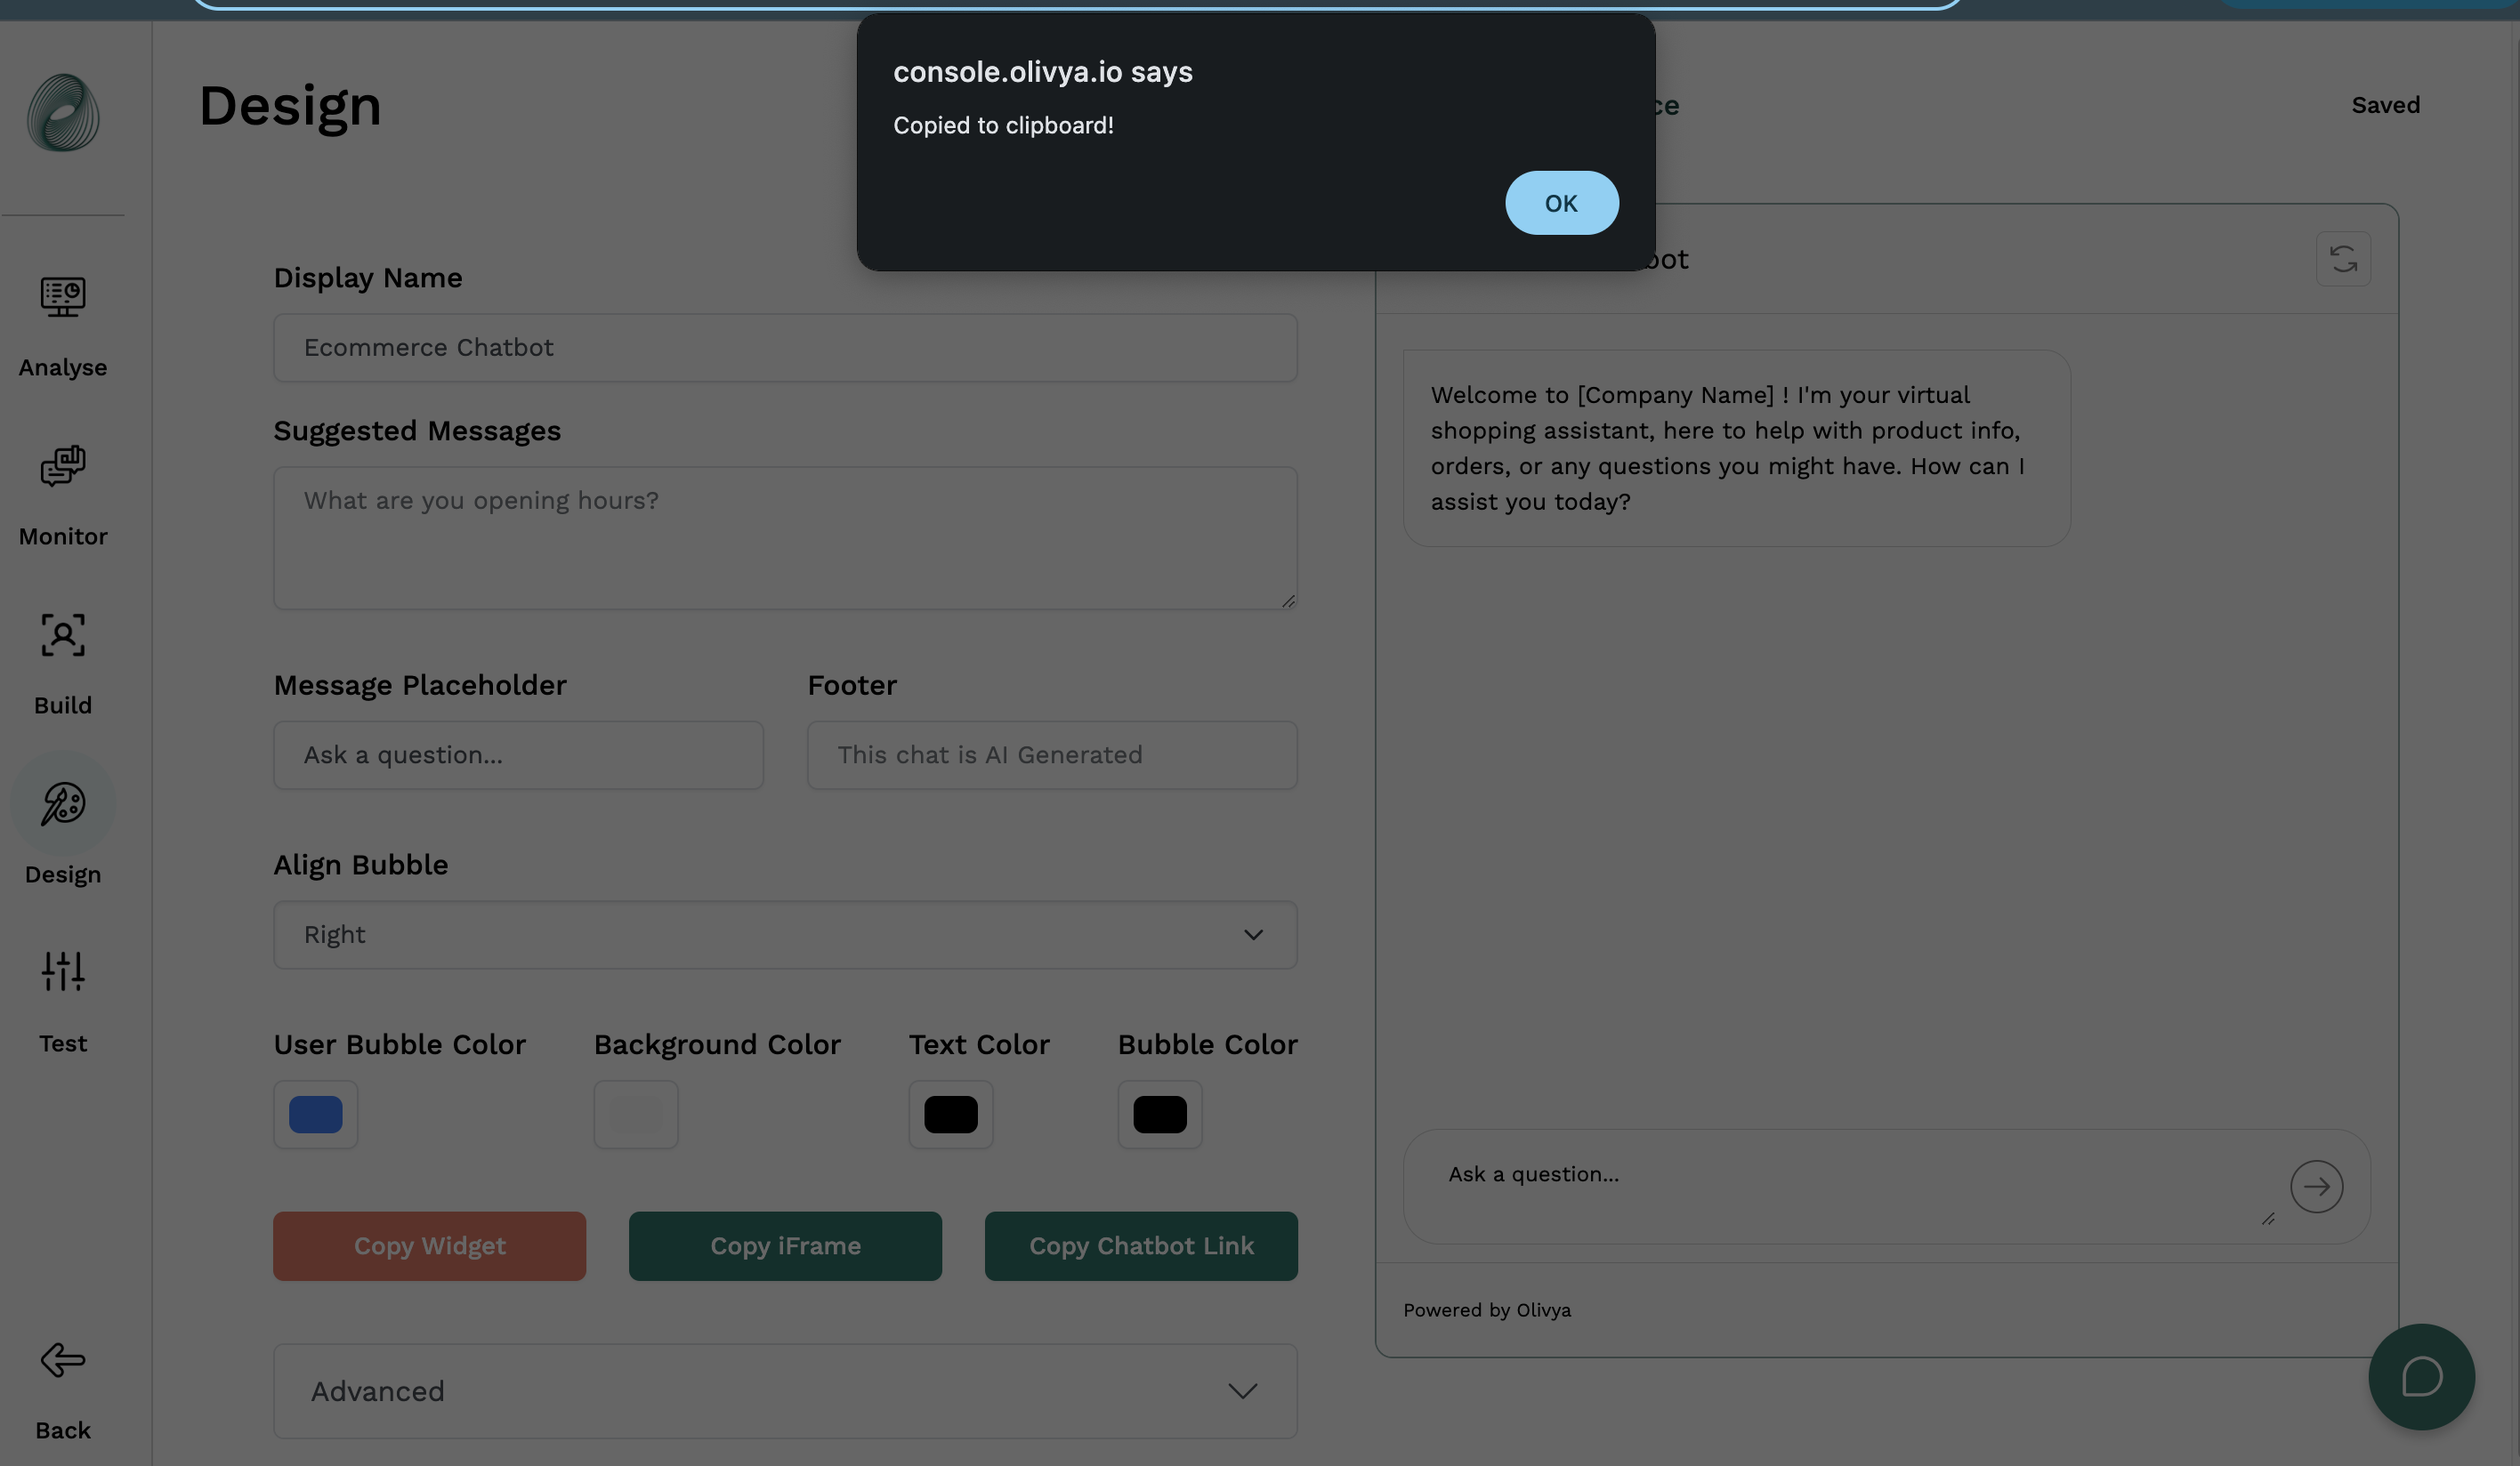
Step 2: Copy the Embed Script
-
Go to your Olivya dashboard and select the bot you'd like to add to your Shopify site.
-
Inside the bot’s configuration, navigate to the Design section.
Once in the chatbot section, click on the Copy Widget button. This script will allow your bot to appear on your Shopify site.
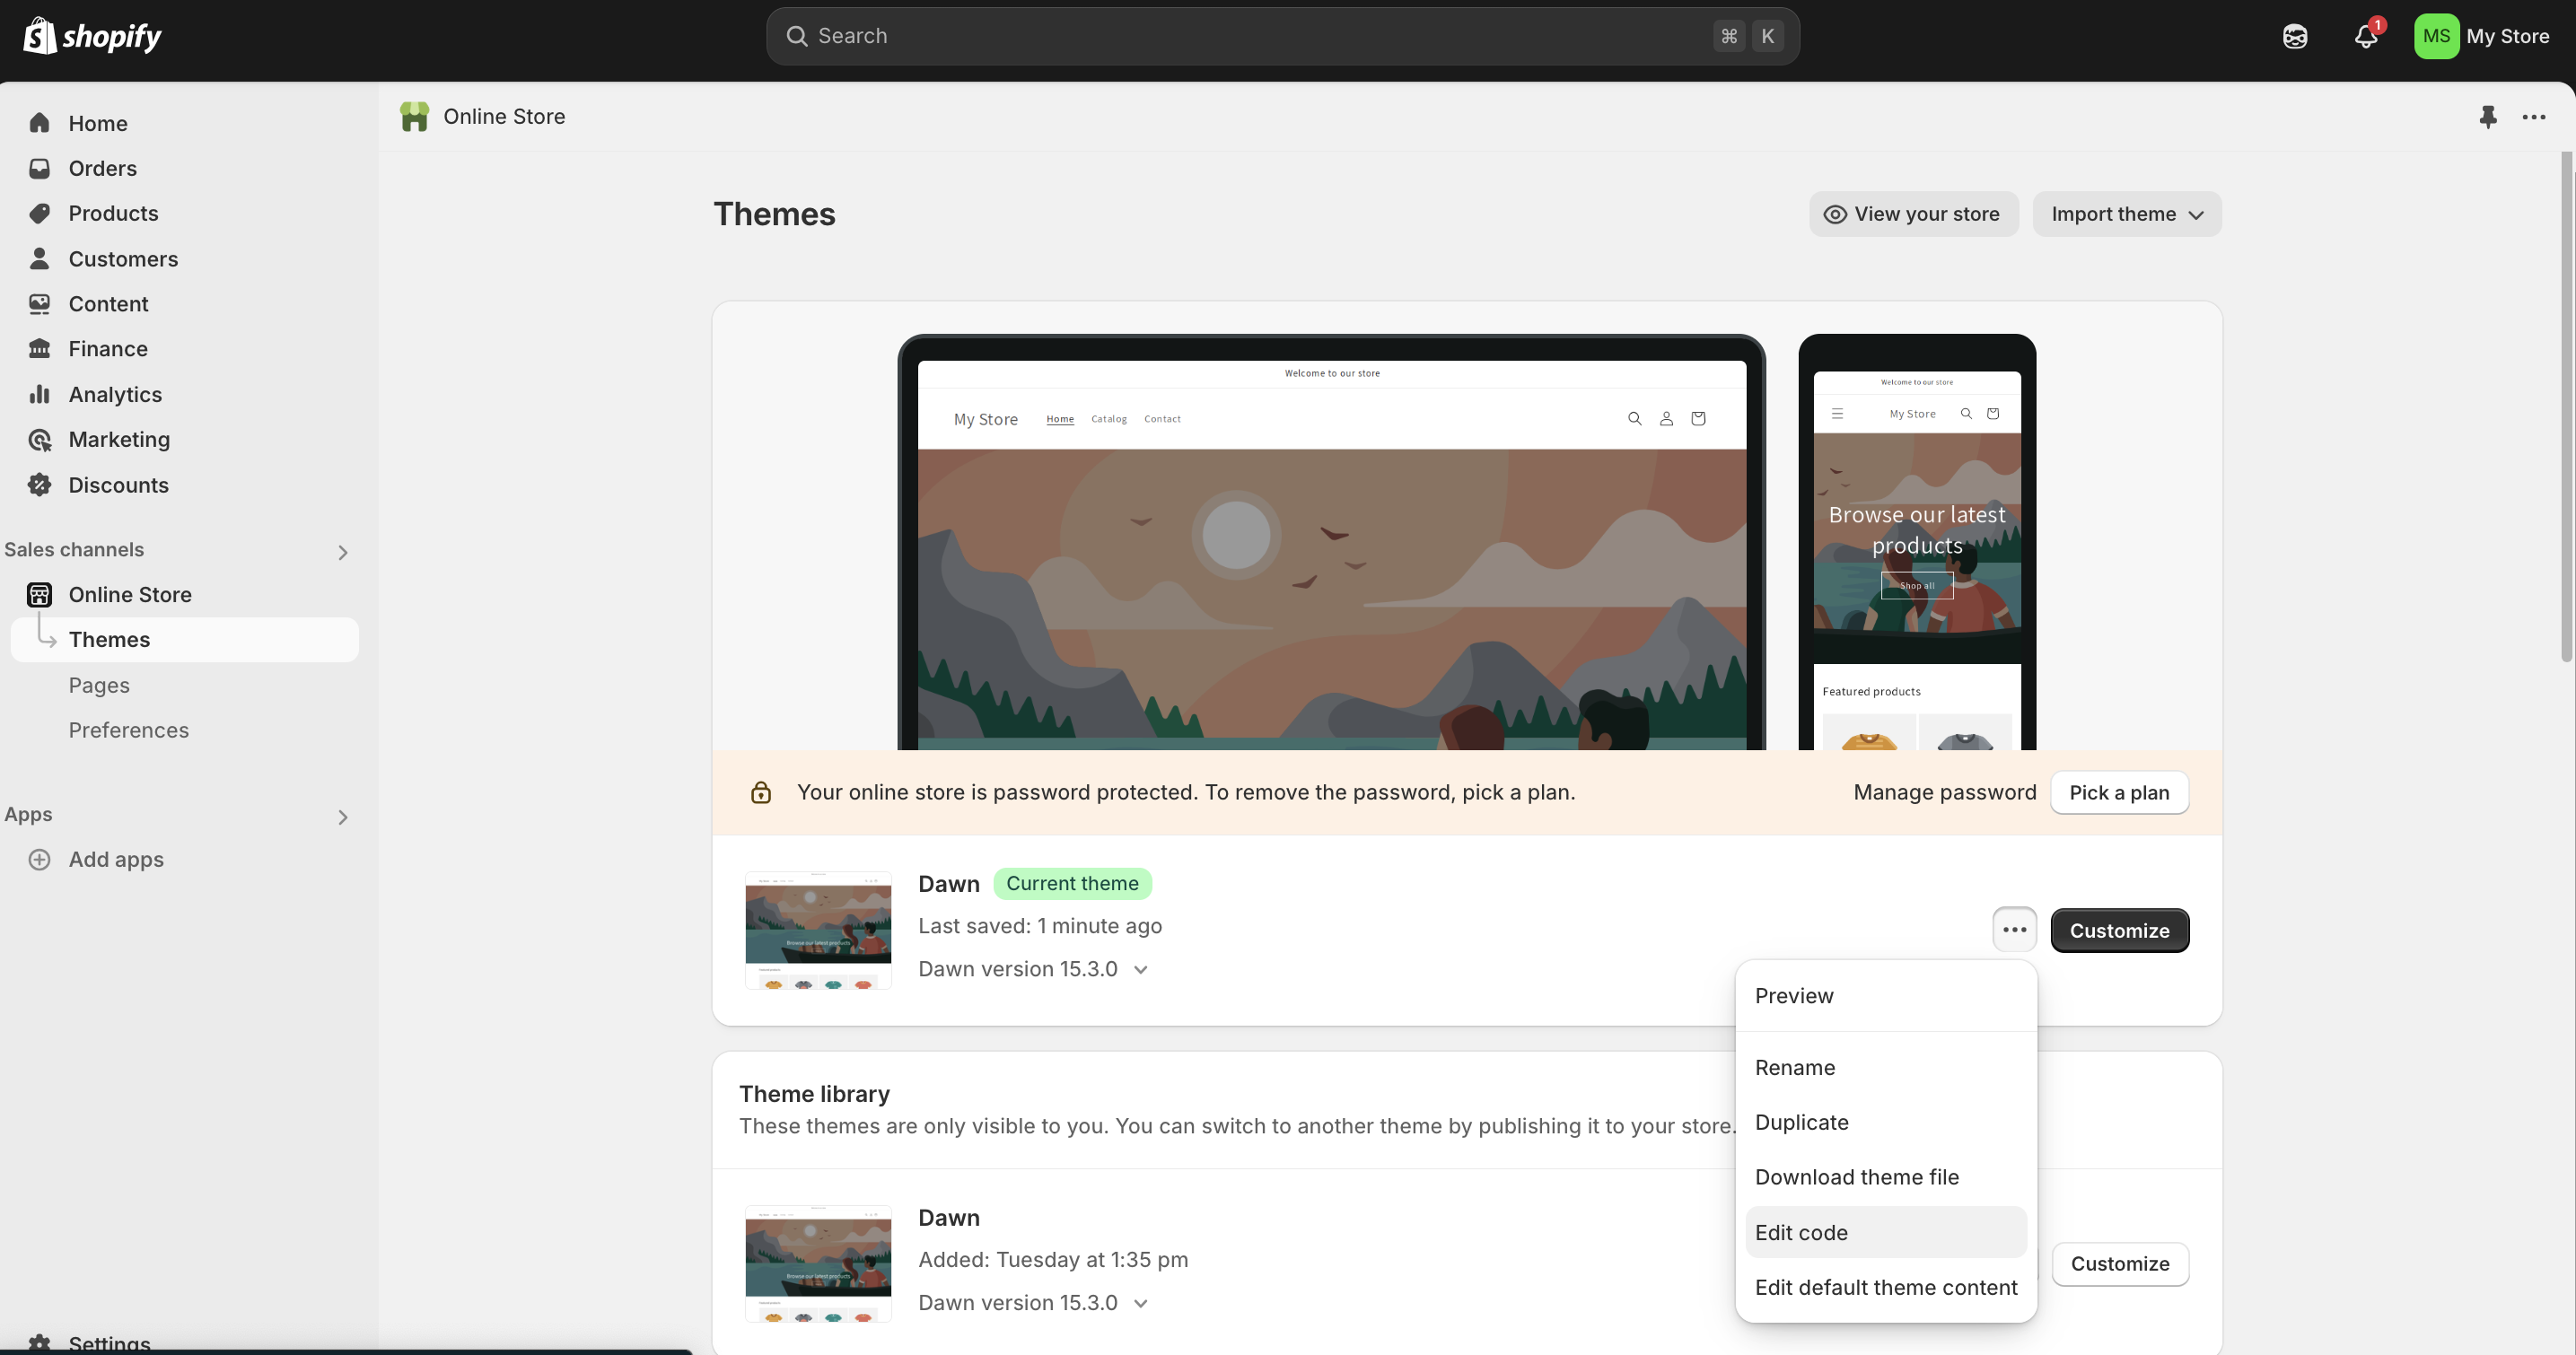
Step 3 : Add the Chatbot to Your Shopify Site
-
Login to your Shopify Admin.
-
In the left sidebar, click on Online Store, then select Themes.
-
In the Themes section, click the three-dot menu (⋯) next to the Customize button, and select Edit code.
4. In the file tree on the left, open the folder named layout.
5. Click on theme.liquid – this is the main layout file that loads on every page of your site.
6. Scroll to the very bottom of the theme.liquid file.
7. Just before the closing </body> tag, paste the widget script:
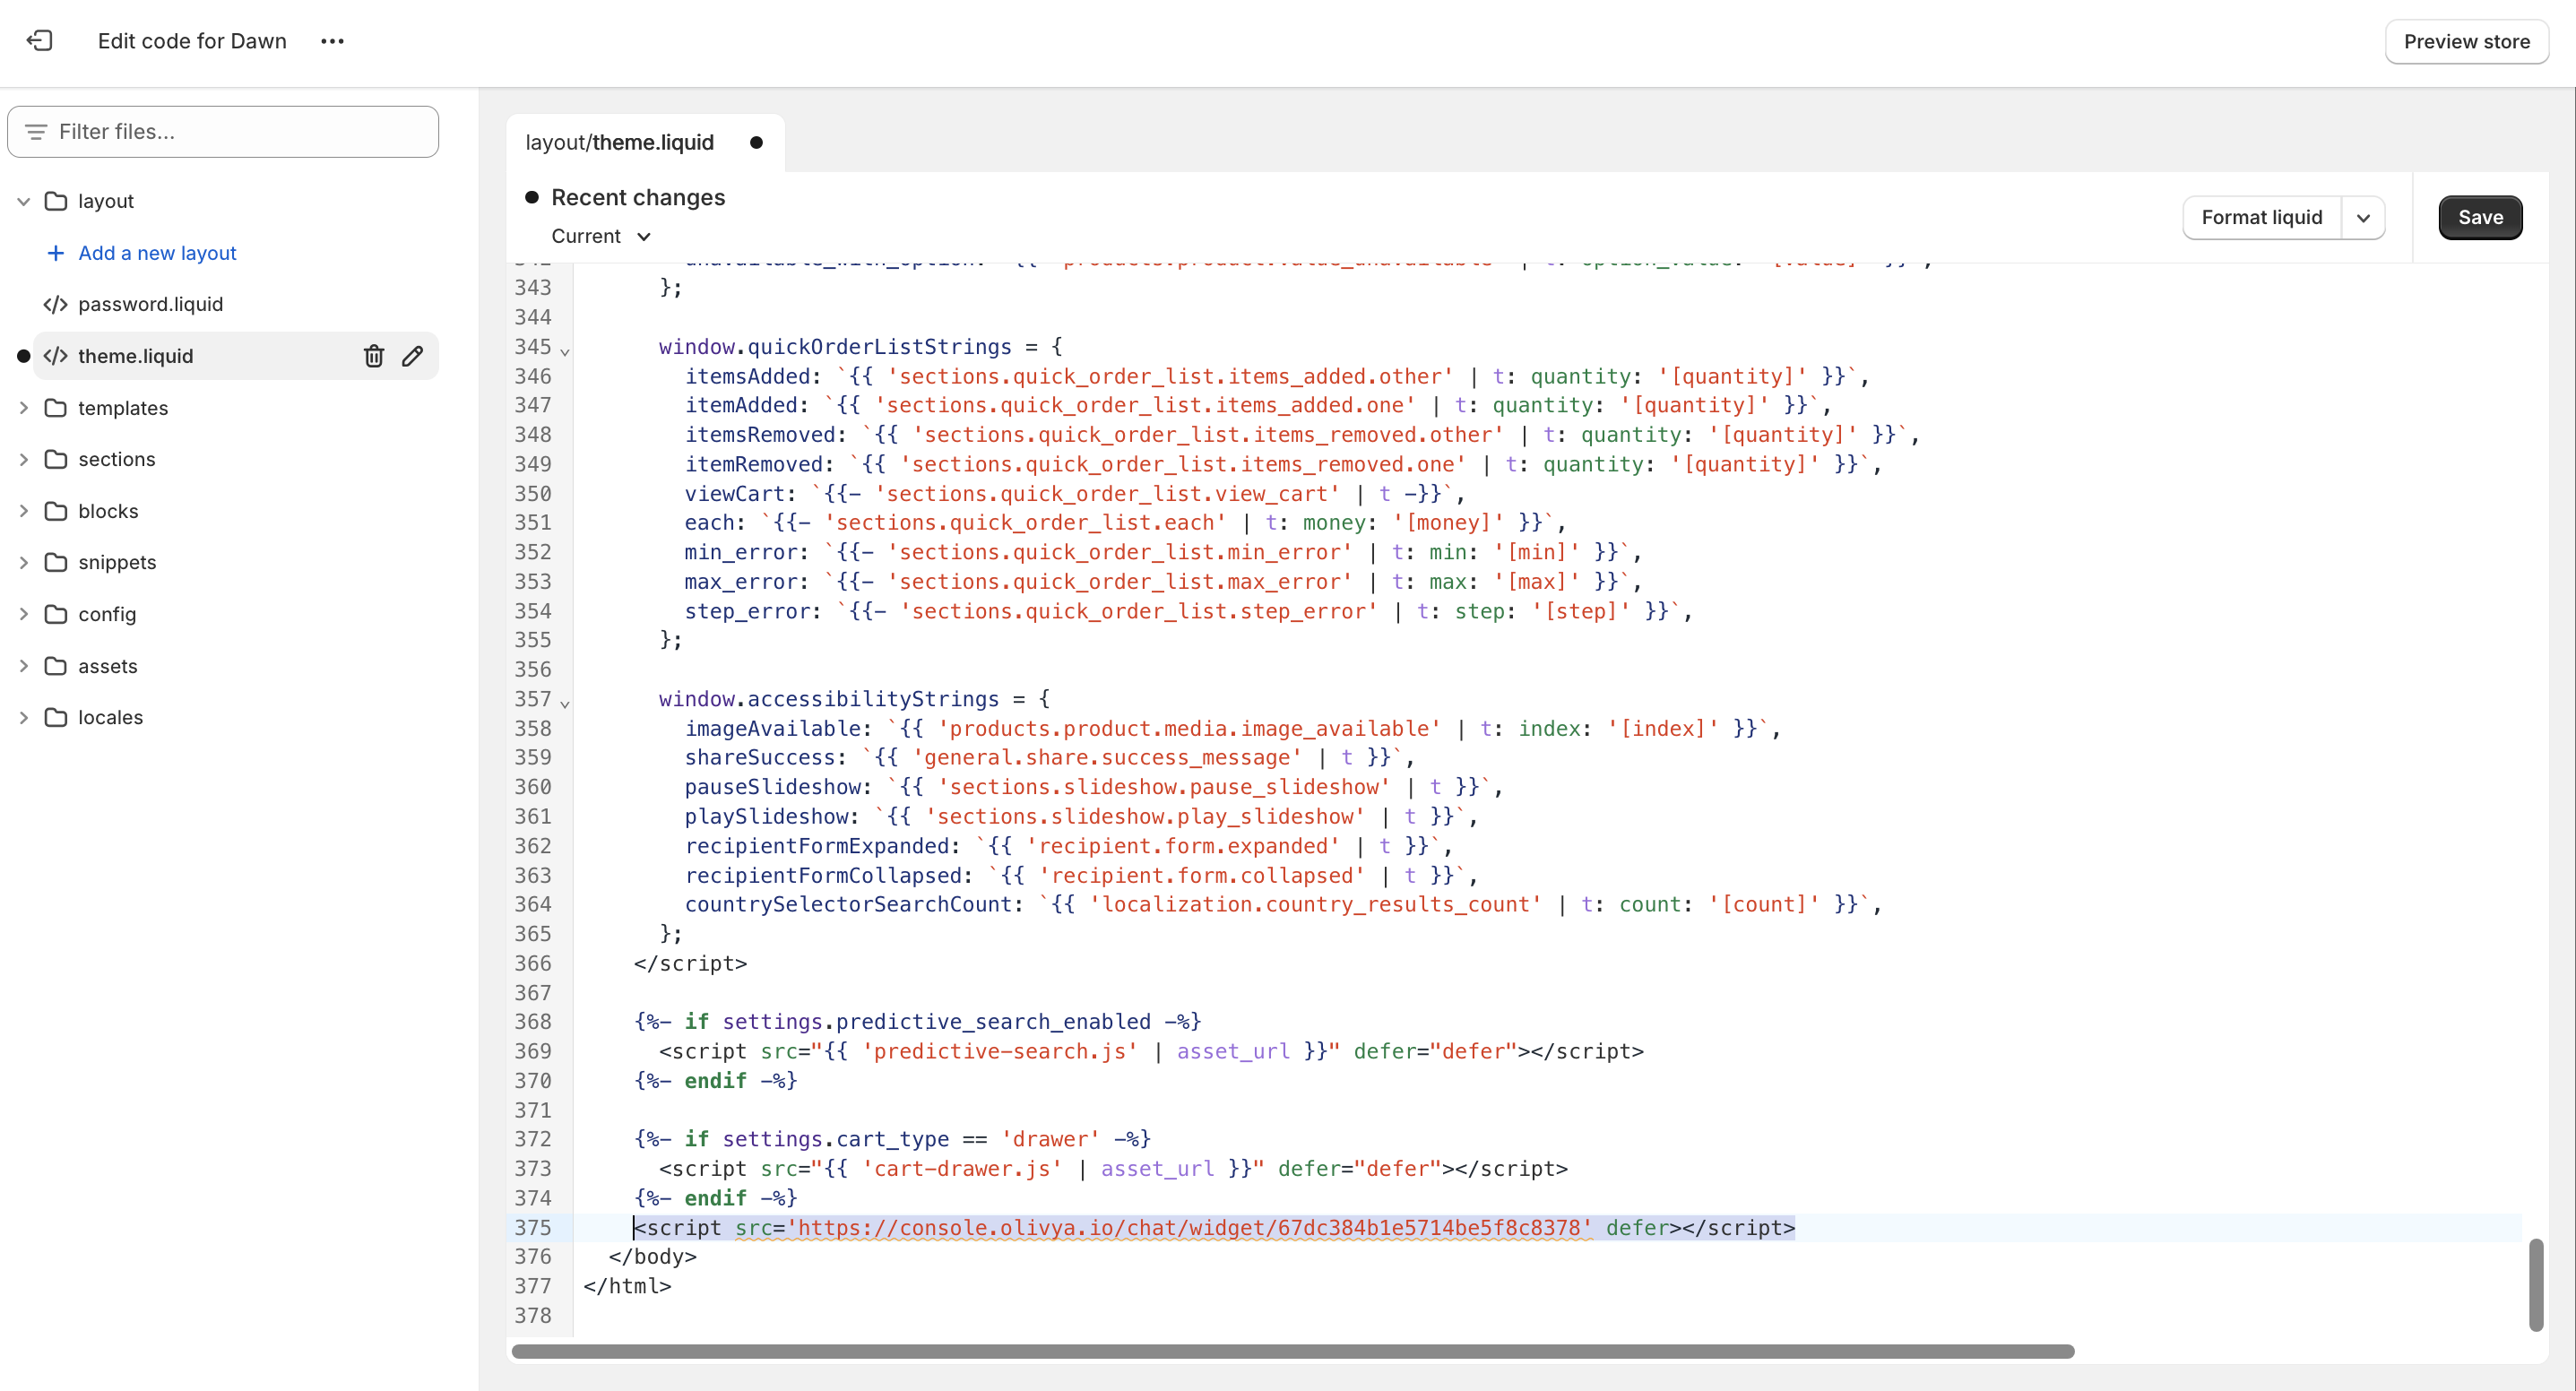
8. Click the Save button in the top right corner.
9. Click the Preview store button in the top right corner. You should now see the chatbot icon appear at the bottom right of every page.
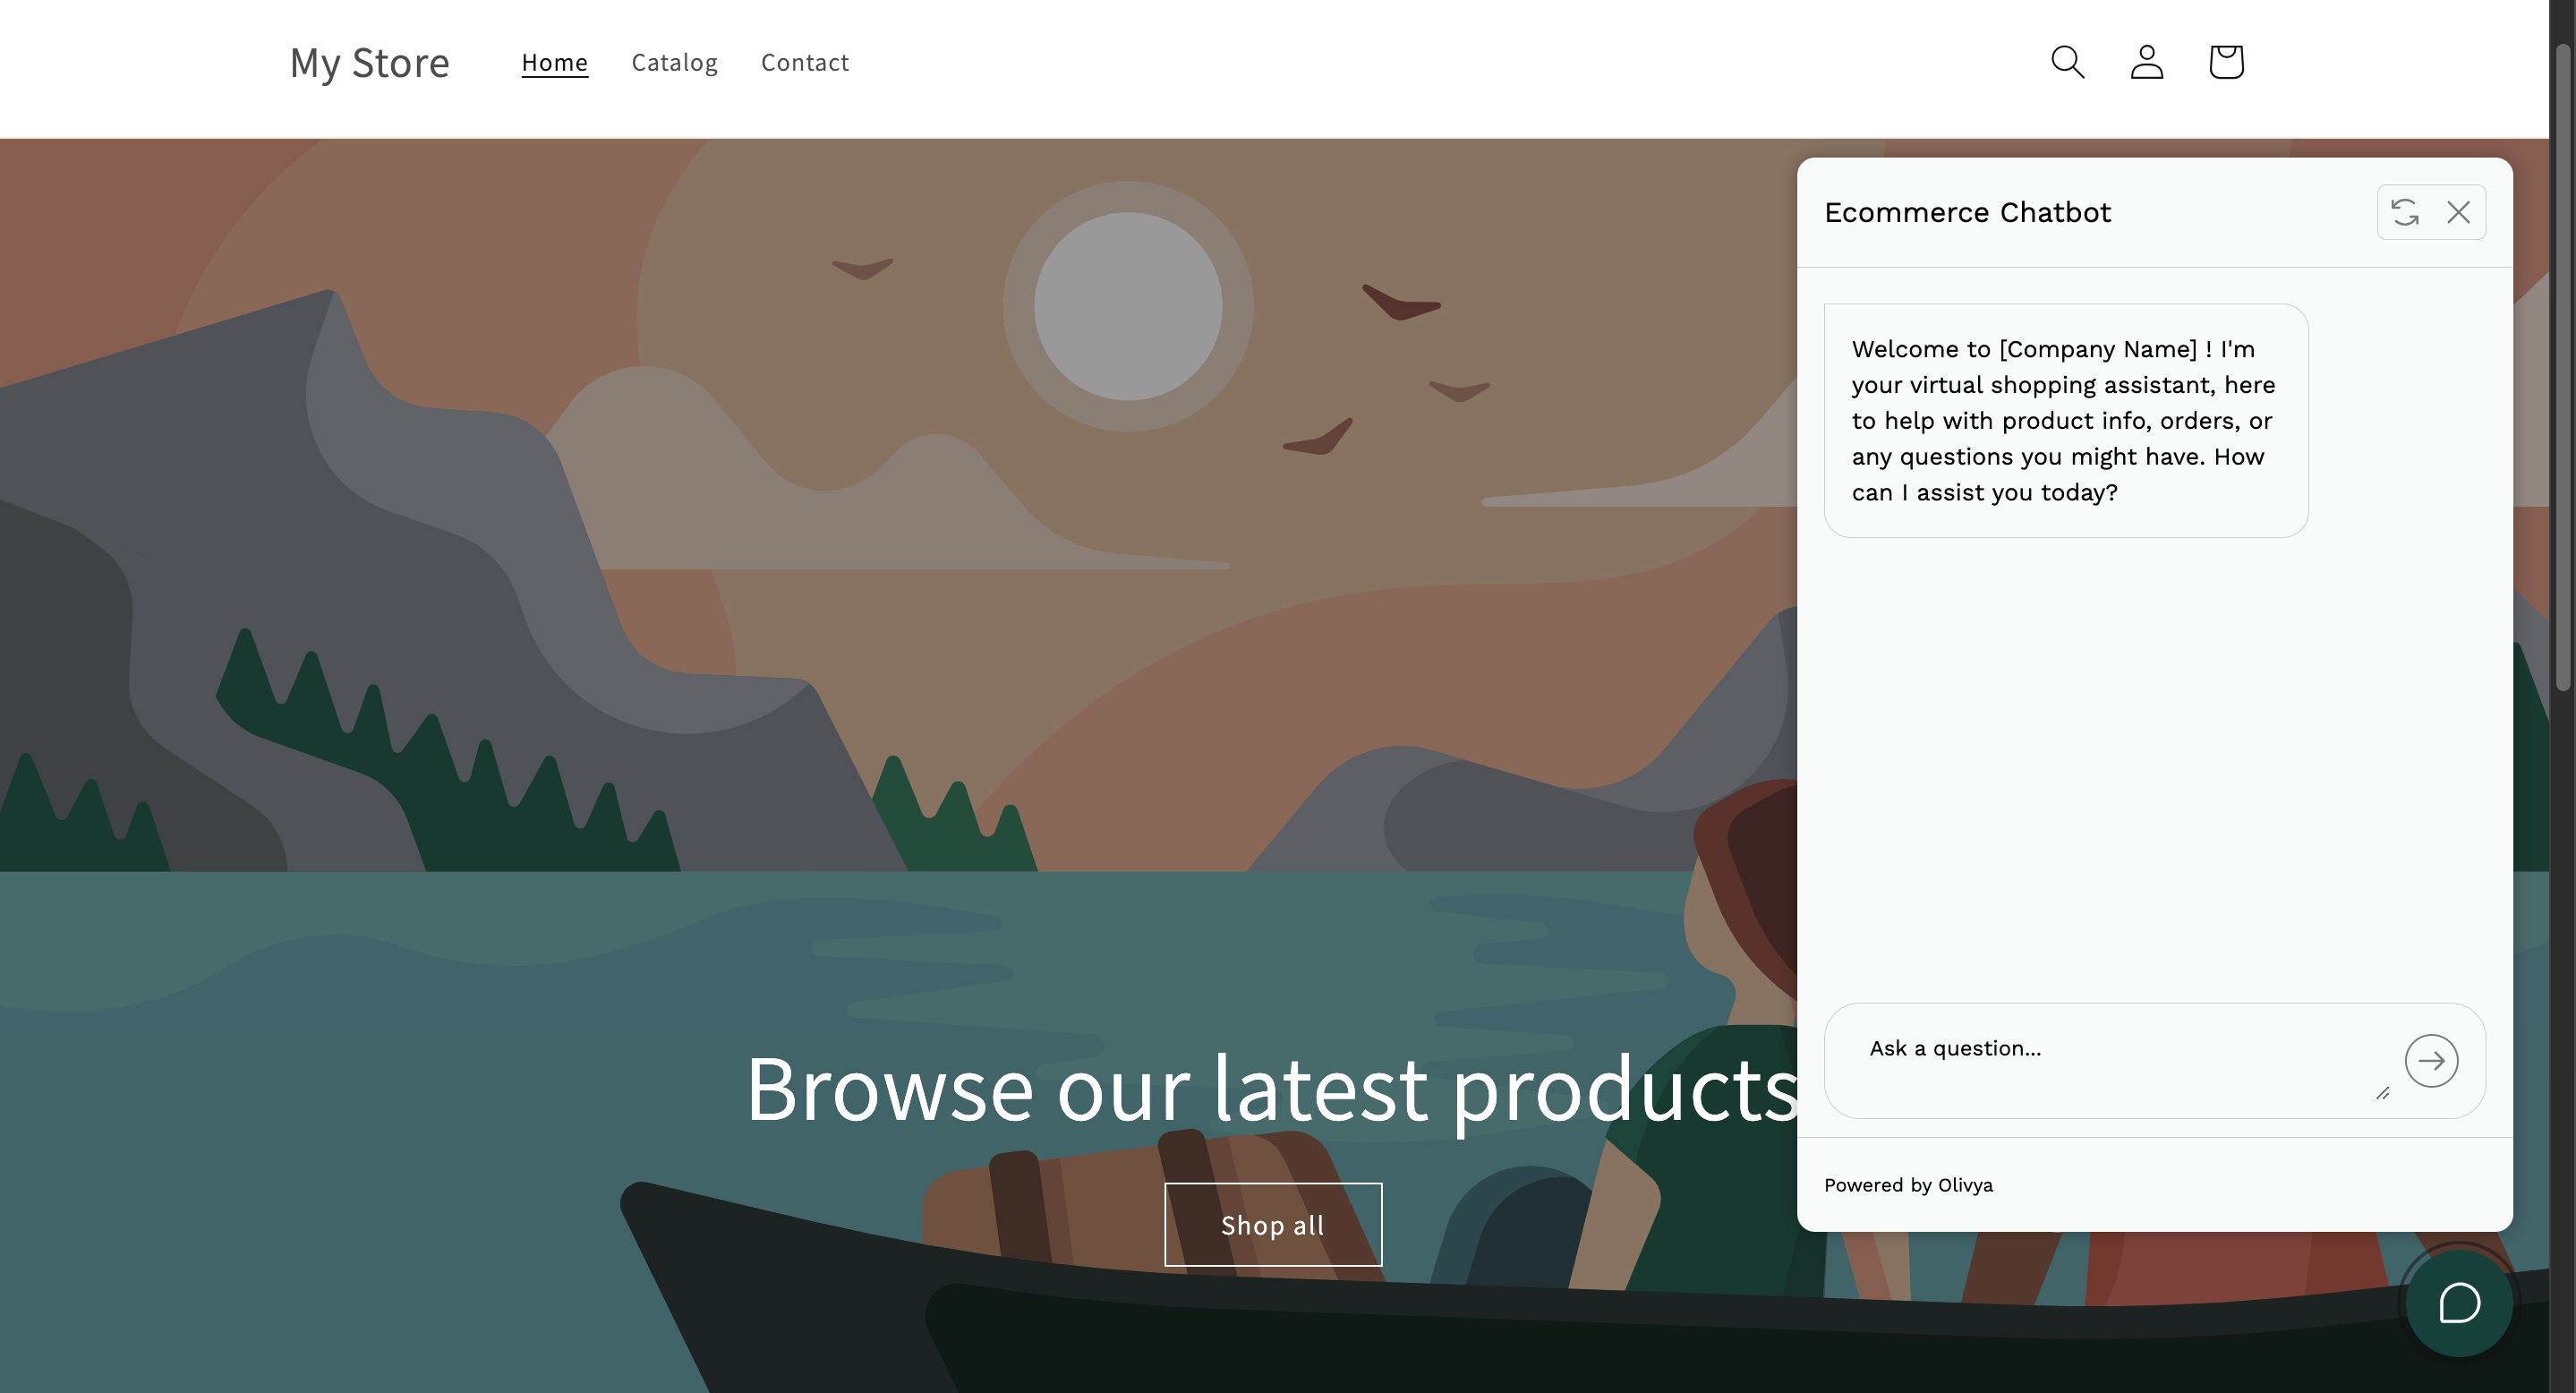
🎉 All Set!
Your chatbot is now running within your Shopify site. You can interact with it to ensure it behaves as expected.